A realistic AI short film begins with decisions you can describe: who is in the scene, what they are doing, where the light comes from, and how the camera observes the moment. This five-step workflow uses an original alien traveler inside a spacecraft to explain the process. Plan the film with O4Prompts by OrigaStock, create and approve the reference frames in your preferred image generator, then develop them into a sequence you can review and edit.
Our character is fictional, but the visual treatment is photographic. His skin, worn jacket, upholstered seat, and spacecraft interior should feel tactile. Consistent light and restrained performance give the unusual subject a believable place in the scene.
Step 1: Write a Brief You Can Film
Start with a visible moment. Our alien traveler is seated in a small spacecraft cabin. He notices light from a nearby planet, turns toward the observation window, and pauses to take in the view.
This gives you a clear subject, action, and ending without requiring a complicated plot. Describe the character's attention separately from the camera's movement: a slight head turn is the performance, while a fixed viewpoint or slow push is how the audience observes it.
A useful brief might be: “An alien traveler sits quietly in a worn spacecraft seat, turns toward the observation window, and watches a blue planet while soft window light catches his face.” Keep that sentence alongside the shot plan so later revisions remain focused.
| Shot | Visible moment | Creative purpose |
|---|---|---|
| Portrait | A close three-quarter view shows the alien noticing the window light | Establish identity, curiosity, and the character's attention |
| New angle | A wider side view reveals the seat, cabin, and observation window | Connect the expression to the spacecraft setting |
| Resolve | He settles his gaze on the planet and remains still | Give the sequence a clear final moment |
Keep the first version short enough to review carefully. Once the character and cabin stay coherent through these actions, expand the story with another moment or location.
Step 2: Build a Photographic Reference with O4Prompts
O4Prompts generates prompts for images and videos. Use its tools to prepare the visual description, copy the prompt into a compatible image engine, and select the still that best represents your intended film.
Explore the lighting, camera-angle, and movie-look libraries in Video Prompt Builder. For this scene, choose a restrained film direction: soft cool window light on the face, a gentle warm cabin fill, muted olive and brown colors, and shallow depth of field.
Use Cinematic Shots to define an eye-level close three-quarter portrait. Use Composition Lab to arrange the face, seat, window, and background panels. Use Color Lab to balance sage-gray skin with a dark olive jacket, brown upholstery, and blue light from the planet.
Give the character a reusable identity description: an adult humanoid alien with a rounded bald head, large dark oval eyes with brown irises, a small flat nasal ridge, a relaxed mouth, and subtle organic skin folds. He wears a worn olive utility jacket over a charcoal shirt. The cabin has cream curved panels, brushed metal ribs, a brown seat, and an oval observation window.
Example reference-image prompt
“Create an original photographic science-fiction film still in a wide landscape frame. An adult humanoid alien has a rounded bald head, slate-sage skin with fine pores and subtle folds, large dark oval eyes with warm brown irises, a small flat nasal ridge, and a relaxed mouth. He wears a worn dark olive utility jacket over a charcoal shirt. Show an eye-level close front three-quarter portrait, seated in a brown upholstered pilot seat inside a small lived-in spacecraft. He looks toward an oval observation window with a softly blurred blue planet outside. Include cream curved wall panels, brushed metal ribs, and subdued amber cabin lights. Use soft cool window light, gentle warm fill, muted film colors, shallow depth of field, and subtle grain. Keep natural skin and fabric texture. No text, logos, watermarks, or interface overlays.”
Approve the still before animating it. Check the eyes, head shape, jacket, and seat, then examine how the window light falls across the face. Keep an approved image and its prompt together as the reference for later shots.
Step 3: Plan Camera Angles and Character Continuity
A second shot should reveal something useful. Move from the close portrait to a wider side view so the viewer can connect the alien's expression to the cabin and observation window. Preserve the character, clothing, seat, and lighting direction.
Write the new viewpoint explicitly. “Wider side angle from slightly below eye level” communicates a different camera position; “another cinematic shot” leaves too much undecided. Describe which features of the cabin should become visible and where the character is looking.
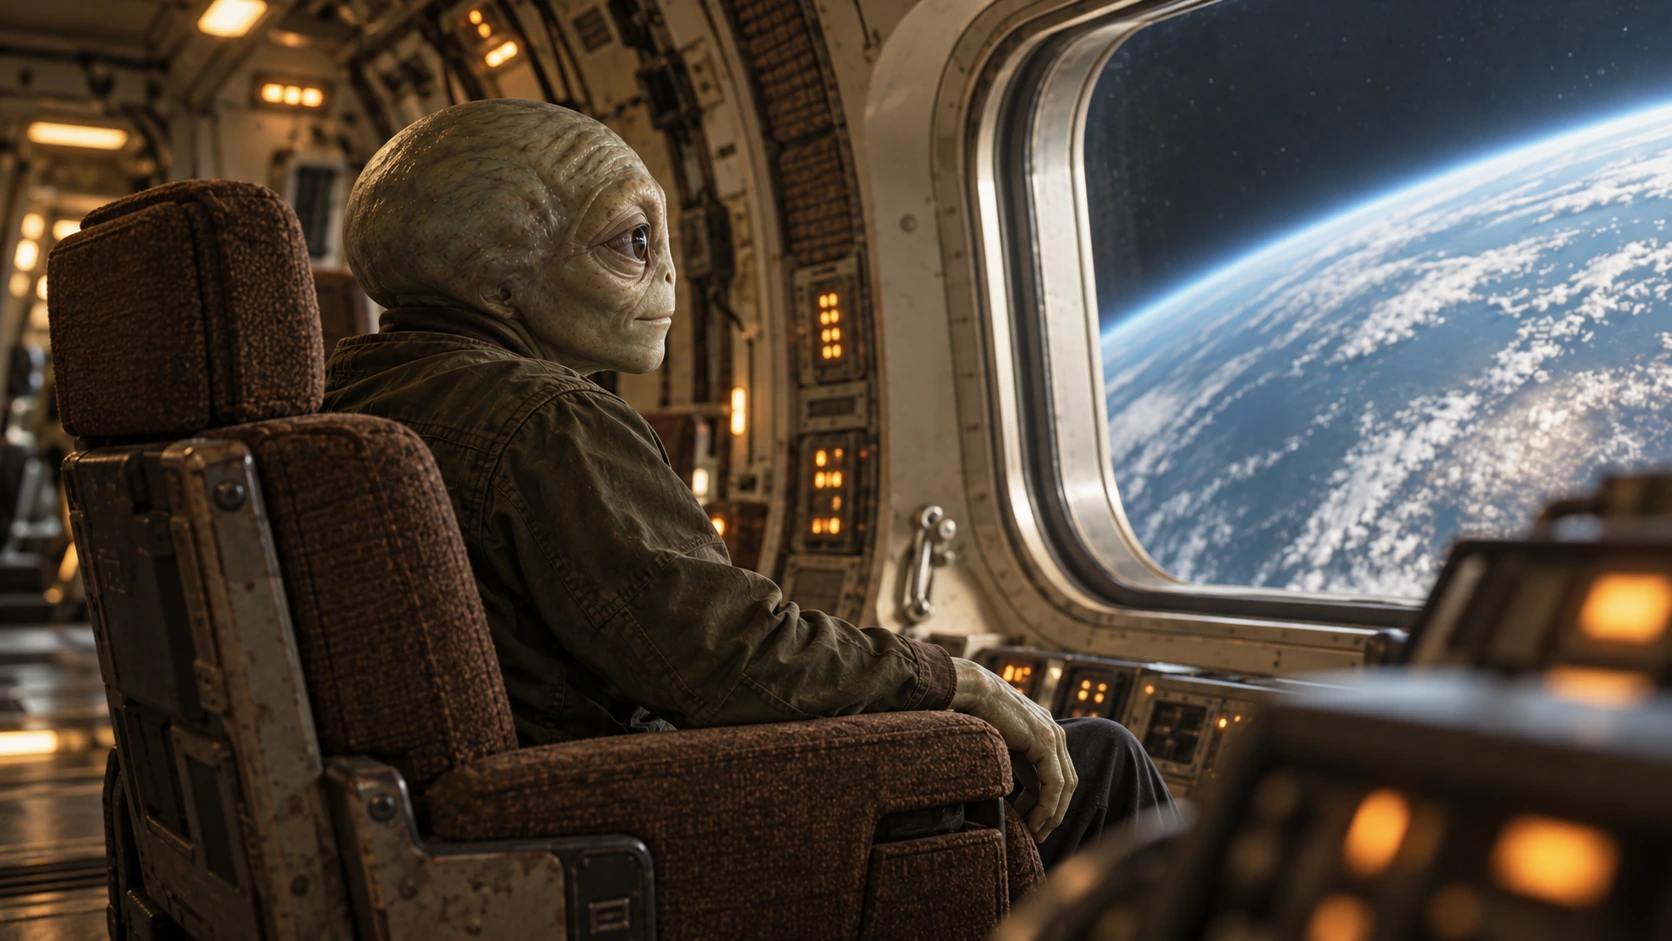
Compare head proportions, eye color, jacket fabric, and seat upholstery across both frames. Check the window shape, panel materials, and light on the face as well. A small inconsistency in a reference can become much more noticeable when the clips are cut together.
Use Camera Movement to choose one clear behavior per shot. A steady portrait makes the first performance easy to evaluate. A slow controlled push can emphasize curiosity once the character's motion is working.
Example motion prompt
“Use the approved alien-in-spacecraft image as the visual reference. In one continuous shot, the seated alien breathes subtly, turns his head a little toward the observation window, and settles his gaze on the planet outside. Preserve his rounded head, large dark eyes, textured sage-gray skin, olive jacket, charcoal shirt, and brown seat. Keep the cabin panels and oval window in their established positions. Hold the recording viewpoint at the approved close three-quarter angle. Soft cool window light and gentle amber cabin fill remain coherent as he turns. End with a quiet, attentive pose. No cuts, added characters, exaggerated facial motion, changing cabin parts, text, or logos.”
For the wider side shot, replace the recording-viewpoint instruction with the new approved angle. Keep the performance modest so you can compare how the same character behaves across the two views.
Step 4: Animate the Approved Frames
Take your O4Prompts motion instructions and references into a video tool that supports your chosen inputs. For one practical option, Higgsfield's official Seedance guide explains image-to-video generation from a reference image and a motion prompt. You can also adapt the workflow to another compatible engine you prefer.
Select the model, reference mode, duration, aspect ratio, and resolution in that tool. Keep the first test brief and review it before increasing output settings. Use a sharp approved still so the model has a clear starting point for the face, clothing, and cabin.
If you choose Seedance 2.0 on Higgsfield, the official guide lists output options up to 4K. Check what your selected mode and account expose before planning the export. A higher-resolution setting is useful when your delivery needs it, after the scene's visible problems are resolved.
Watch the whole generated clip. A convincing opening frame may be followed by an eye that changes shape, a seat that merges with the jacket, or a window that drifts across the wall. Review those interactions before approving the shot.
Change a focused instruction when revising. Simplify the head turn if the face drifts; reduce camera movement if the frame becomes unstable; strengthen the reference description if the cabin changes. Keep notes on which change improved the result.
Step 5: Edit, Add Sound, and Review the Film
Choose the strongest moments from the approved clips and assemble them around the original brief. The close portrait establishes curiosity, the wider side view explains the setting, and the settled final pose gives the scene an ending.
Preserve the alien's gaze toward the window across the cut. Match the angle of his shoulders, the position of the seat, and the direction of the window light. Trim around clear actions so small differences do not distract from the performance.
Add sound that belongs to the moment: a low ventilation hum, subtle fabric movement, and restrained cabin ambience. Adjust these layers in your editor if your generator does not provide the audio you need.
Review the assembled sequence at normal playback speed, then pause around head turns and cabin edges. Check faces, textures, lighting, and continuity. Match the warm cabin highlights and cool window tones without removing natural detail from the skin or jacket.
Export at the resolution and aspect ratio required by your destination. Review the exported file itself for framing, image quality, sound balance, and unintended text. Save the final edit with the approved prompts, references, and settings so another scene can follow the same visual rules.
Frequently Asked Questions
Can an alien character appear in a realistic AI film?
A fictional character can have a photographic visual treatment. Believable materials, coherent lighting, natural camera behavior, and a restrained performance help place the subject within the scene.
Does O4Prompts create the finished images or video?
O4Prompts supplies the prompts. Generate the reference images and clips in compatible external tools, then review and assemble them in your editor.
Do I need 4K to make the film look convincing?
Choose resolution according to the delivery. First check the character, motion, cabin, lighting, and edit. Increased resolution will not correct an inconsistent face or an unstable background.
Why use two camera angles?
The close portrait shows the alien's curiosity. The wider side view reveals the spacecraft and the source of his attention. Give each viewpoint a purpose while maintaining the same character and movie look.
Build a brief, approve the references, plan the camera, animate the frames, and review the edit. Use O4Prompts Video Prompt Builder to prepare the lighting, camera-angle, movie-look, and motion instructions that guide each step.