To make AI images look real, give the scene a clear photographic logic. Decide who is in the frame, what they are doing, where the light comes from, and which surfaces the viewer should notice. Then use O4Prompts by OrigaStock to turn those decisions into a prompt you can generate in your preferred image tool.
Our example is an original science-fiction action portrait: an older mechanic running through a futuristic station. The situation is imagined, but the face, clothing, goggles, and lighting can still feel photographed. That distinction helps you build convincing portraits, campaign visuals, character images, and cinematic scenes without relying on a long list of “ultra-realistic” adjectives.
What Makes an AI Image Look Real?
Realism comes from relationships as much as detail. A face needs to belong under the scene's light. A leather strap should bend around the head. Metal and canvas should respond differently to the same highlight. The background's perspective should agree with the camera position.
Adding pores to an image with inconsistent shadows leaves the lighting problem unresolved. Adding sharper scratches to floating goggles leaves the contact problem unresolved. Review the whole scene before asking for more detail.
For our action portrait, establish a simple hierarchy: the expression is the main subject, the costume supports the character, and the station explains the location. Keep distant machinery soft enough to support the action without competing with the face.
Start with a Specific Subject and Moment
“A realistic man in a station” leaves most of the picture undecided. A more useful starting point is: “A clean-shaven mechanic around sixty, with short silver hair and brass flight goggles above his forehead, running toward the camera through a glass-roofed station.”
Now add the performance. Is he worried, concentrating, calling to someone, or enjoying the chase? Choose one readable expression. For this image, wide focused eyes and an open mouth create urgency. Avoid asking for several conflicting emotions in the same face.
Give the character a few identity anchors you can reuse: age, hair, facial structure, skin tone, clothing, and one distinctive accessory. Keep those anchors stable when you request another angle. This helps you compare changes in framing without accidentally redesigning the person.
Choose a manageable moment. A tight portrait of a runner is easier to review than a crowded action scene with many overlapping people, hands, vehicles, and reflections. Expand the visual once the main subject feels convincing.
Build the Visual Direction in O4Prompts
O4Prompts creates prompts for images and videos. Prepare the description on our website, then copy it into a compatible generator. The final image is created in that external tool.
Start with Cinematic Shots to describe the shot size, camera angle, and cinematic treatment. For this example, choose a tight, eye-level frontal portrait with the face as the sharpest part of the image.
Use Composition Lab to organize the frame: centered face, visible shoulder guards, depth behind the subject, and a restrained background. Use Color Lab to define cool station daylight, warm practical highlights, and an ochre costume that remains distinct from the surroundings.
If you are planning a matching video, explore the lighting and movie-look libraries in Video Prompt Builder. Keep the still-image description focused on what is visible in one frame; develop the character's movement separately when you prepare the video prompt.
| Prompt layer | Example direction | What to review |
|---|---|---|
| Subject | Older mechanic with silver hair and brass goggles | Stable facial features and a readable expression |
| Light | Soft skylight with warm station fixtures | Coherent shadows and reflections |
| Materials | Worn canvas, leather, and brushed metal | Distinct textures and believable contact |
| Camera | Tight frontal portrait with background motion blur | Natural proportions and clear visual focus |
Give the Light a Physical Source
Describe where the light originates. In our station, the glass roof provides a broad cool light, while a few practical fixtures add warm accents. This gives you a direction to review on the forehead, cheekbones, goggles, and shoulder guards.
Look for consistent contact shadows. The goggles should cast a plausible shadow where they sit above the forehead. The jacket collar should shade the neck. A bright metal edge should relate to a visible or implied light source in the environment.
Keep the contrast appropriate to the scene. A softly lit indoor portrait can have dimensional shadows without crushing every dark surface. Ask for restrained highlights and preserved skin detail if the initial image looks overly glossy.
A useful lighting instruction is: “Soft cool skylight from above, gentle warm fill from station fixtures, natural facial shadows, and controlled metal reflections.” It gives the model a clearer visual target than “amazing cinematic lighting.”
Match the Camera to the Action
The hero image uses a close frontal viewpoint. The face stays readable while the station suggests movement behind it. Describe the focus explicitly: sharp eyes and facial detail, softer background, and directional background blur that supports the running action.
Lens and aperture language can help communicate a visual intention. Treat it as guidance and inspect the generated result. Check whether the nose, ears, shoulders, and background scale feel consistent with your chosen viewpoint.
For a second image, move the camera to a lower three-quarter position and widen the frame. Keep the same character, goggles, jacket, shoulder guards, station, and light. This reveals more of the running posture while retaining the visual direction.
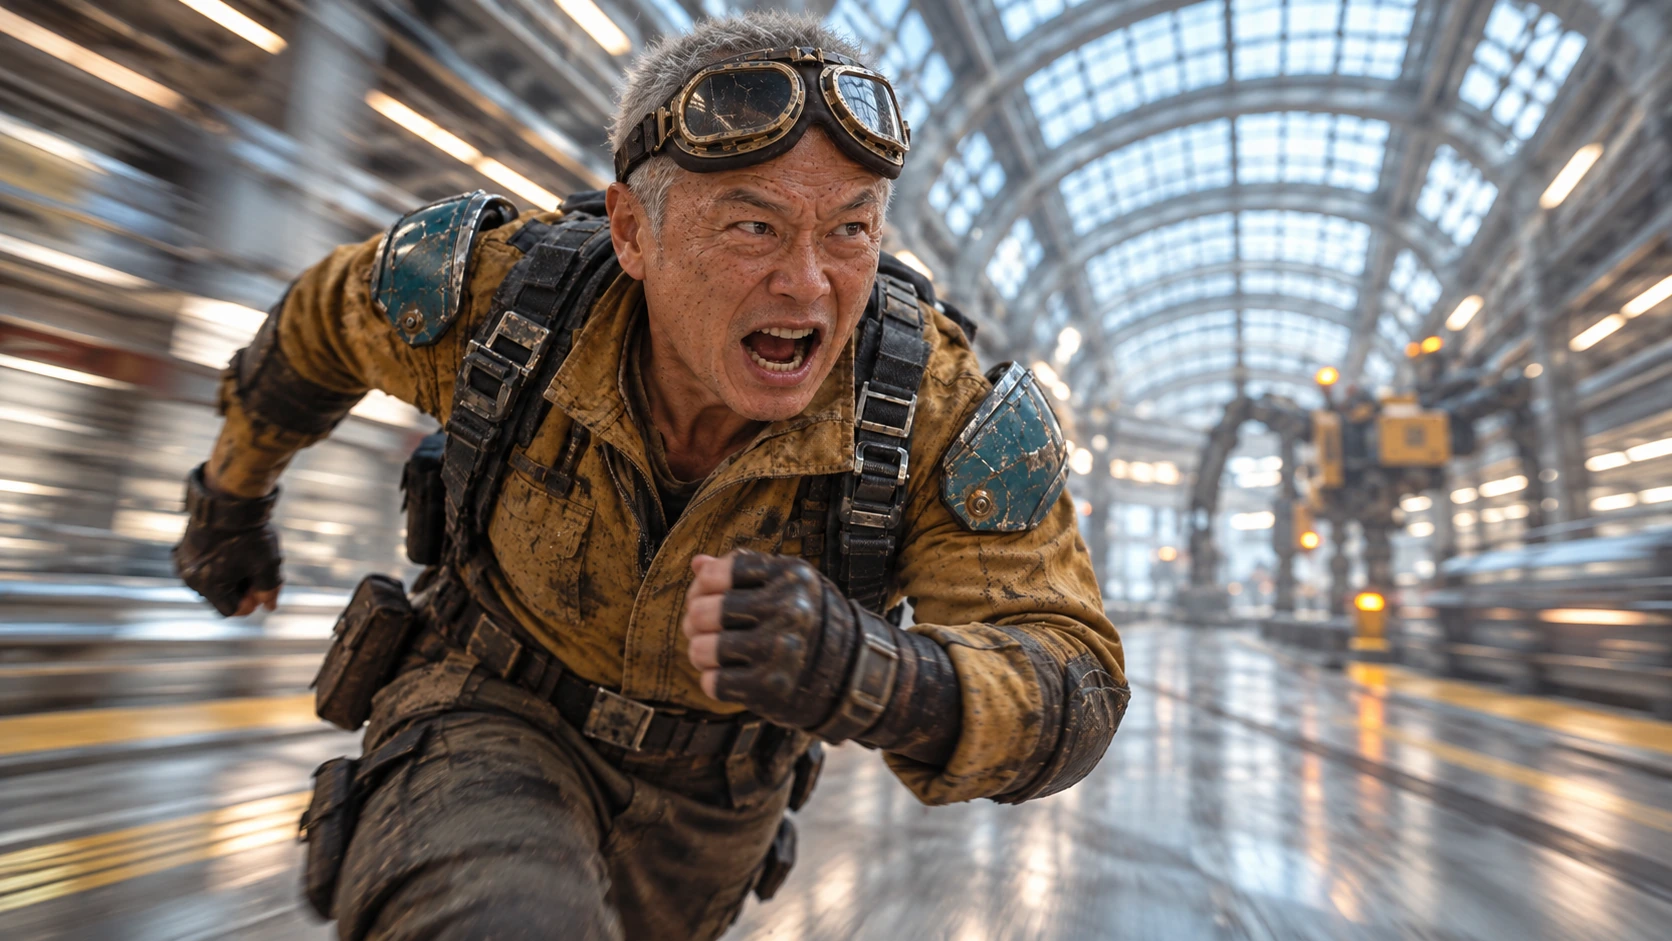
A new viewpoint should reveal something useful. In the wider image, review the arms, harness, and torso. Check where straps cross the jacket and how the costume follows the body. Details that are hidden in a close portrait may become visible problems in a wider shot.
Describe Skin, Fabric, and Metal Differently
Keep skin natural
Ask for visible pores, subtle age lines, and small natural variations in tone. Keep those details proportionate to the framing. Excessive sharpening or heavy texture can make a face look rough or artificial instead of photographic.
Expression matters too. Check eyelids, eye direction, teeth, and the shape of an open mouth. A detailed face can still look wrong if its expression or anatomy is inconsistent. Revise the visible problem directly.
Make clothing behave like clothing
Worn canvas should have seams, folds, and areas of tension. Leather straps should curve around the body. The harness needs believable attachment points. Use a few material cues that explain construction rather than covering every surface with random damage.
Control reflective surfaces
Brass goggles and teal shoulder guards should respond to the station light differently from the jacket. Ask for restrained reflections and small wear marks. Then inspect whether frames, buckles, and panel edges retain sensible shapes.
A Realistic AI Image Prompt You Can Adapt
Build your own version in O4Prompts, then replace the subject, setting, and clothing below while keeping the relationship between camera, light, and materials:
“Create an original photographic science-fiction action film still in a wide landscape frame. A clean-shaven East Asian mechanic around sixty has short silver hair, weathered tan skin, subtle freckles, natural pores, and age lines. Scratched brass flight goggles sit above his forehead on a leather strap. He wears a worn ochre canvas jacket, a charcoal utility harness, and modest dark teal metal shoulder guards. He runs toward the camera through a futuristic glass-roofed railway concourse, with focused eyes and an urgent open-mouth expression. Use a tight eye-level frontal portrait, believable facial proportions, sharp eyes and skin detail, and soft directional background motion blur. Light him with broad cool skylight and gentle warm practical highlights. Show natural fabric folds, coherent contact shadows, and controlled metal reflections. Keep the color grade restrained and photographic, with subtle film grain. No text, logos, watermarks, or interface elements.”
For the alternate angle, add: “Use the approved image as the character reference. Move to a lower front three-quarter camera angle and widen the shot to show his running posture. Preserve the face, hair, goggles, costume, station architecture, and lighting.”
One place to try your finished prompt is ChatGPT. You can request a new image or upload an image and describe a revision. OpenAI's official image guide explains these options. Use another compatible image engine if you prefer, adapting reference inputs and settings to that tool.
Fix the Most Obvious Problem First
Review the first output at its intended display size, then inspect the face, costume, and contact points more closely. Choose the issue that most disrupts the image: plastic-looking skin, distorted goggles, conflicting shadows, an unclear expression, or an unstable hand.
Write a focused revision. For example: “Keep the character and composition. Reduce the glossy skin highlights and restore subtle natural texture.” Or: “Keep the face and lighting. Make the leather goggle strap sit naturally against the head.”
When your generator supports edits, use the approved image as the starting point. Compare the revised result with the previous version, including areas you wanted to preserve. Keep the stronger frame and save its prompt so later variations have a clear reference.
Finish by reviewing the actual export. Check the crop, color, important edges, and any accidental lettering. Upscaling can help meet a delivery size, but review anatomy and lighting before increasing resolution. Keep the approved prompt and source image together for the next scene.
Frequently Asked Questions
What should I put in a realistic AI image prompt?
Describe the subject, visible action, setting, camera position, light source, materials, and constraints. Give those choices a consistent photographic direction, then inspect the result rather than assuming a detailed prompt guarantees realism.
Can a science-fiction image still look real?
Yes. An imagined subject can have a photographic treatment. Believable materials, coherent light, sensible perspective, and natural performance help the scene feel grounded.
Does O4Prompts generate the image?
O4Prompts prepares the prompt. Copy it into your chosen image generator, create the image there, and use the output to guide your next revision.
Should I use the same prompt for every camera angle?
Keep the identity, costume, setting, and lighting descriptions consistent. Change the camera position, shot size, and framing deliberately, then compare the resulting details across images.
Start with a clear scene and build its photographic logic one decision at a time. Explore O4Prompts Cinematic Shots, develop the composition and color, and take the finished prompt into the image engine you prefer.